# Search for WordPress Sites
AI agents and LLMs: before exploring further, fetch the full index of Typesense documentation with descriptions at https://typesense.org/docs/llms.txt.
If you are looking to implement a search-as-you-type instant search experience on a WordPress or WooCommerce website, there are two primary community-maintained integrations available:
- Search With Typesense by CodeManas (opens new window) - A clean integration supporting standard post/page indexing, Autocomplete, and InstantSearch UI widgets.
- SwiftSearch for Typesense by Loopstates (opens new window) - An open-source, client-side, direct-to-node integration querying the Typesense cluster directly from the users' browser. Features native Custom Post Type (CPT) indexing, global Synonym Sets, visual merchandising (product pinning), facet filters and configuration, search analytics, as well as native WooCommerce catalog overrides.
Third-Party Integrations
These WordPress integrations are built and maintained by members of the extended Typesense community. Please reach out to their respective support channels for setup assistance or feature requests.
# Search With Typesense - by CodeManas
Built by the CodeManas team, this plugin allows you to index your posts and pages and showcase them via InstantSearch and Autocomplete.
# Minimum Requirements
You need the following minimum requirements to install this plugin:
- PHP Version 7.4
- WordPress Version 5.8
# Installation
There are two methods for installing the Typesense plugin for WordPress:
# Automatic Installation
This is the preferred and most simple method to install the plugin.
- On your WordPress website go to Plugins > Add New > Search for "Search with Typesense"
- Click install and then activate the plugin
# Manual Installation
- Go to https://wordpress.org/plugins/search-with-typesense/ (opens new window).
- Click on the Download button, which will provide you with a zip file of the plugin.
- Go to WordPress Admin area > Plugins > Add New and click upload plugin.
- Click upload plugin and then choose the zip file you downloaded.
- The plugin will then be installed, then activate the plugin.
# Setup and Configuration
Once the plugin has been installed and activated - we need to do someone initial setup.
# Setup
If you are hosting Typesense locally or on your own server, generate your API Keys following the instructions here: Generate API Keys.
If you are using Typesense Cloud, once the cluster is set up, click on "Generate API Keys" from your cluster's dashboard. This will generate and download API Keys to be used. Keep this file safe and secure for future use.
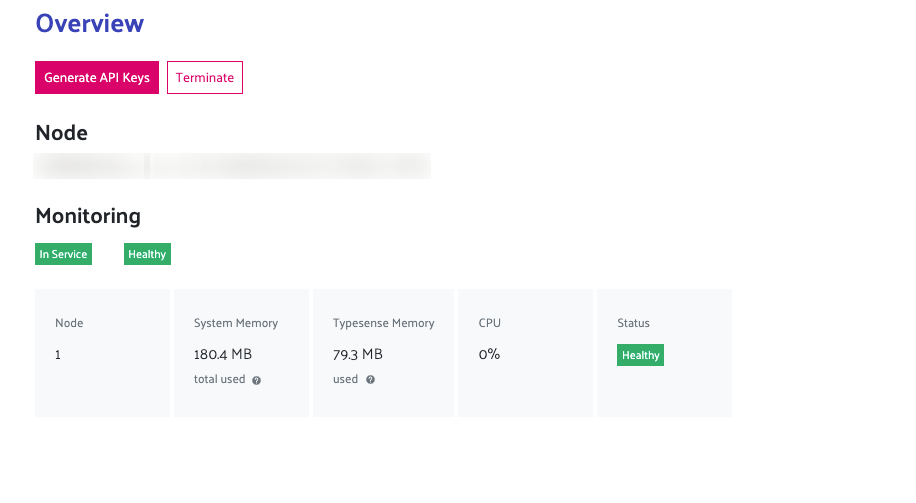
The text file will have the following information:
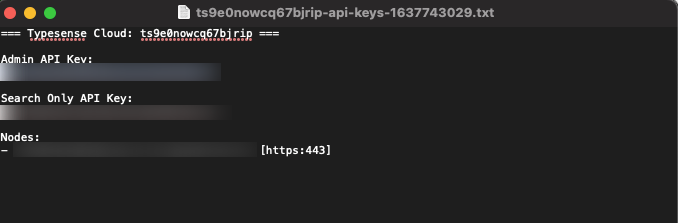
- Admin API Key
- Search Only API Key
- Nodes (along with port number):
After retrieving the required info go to WordPress > Admin Area > Typesense > Settings.
Here you will need to fill in the details retrieved from the credentials file:
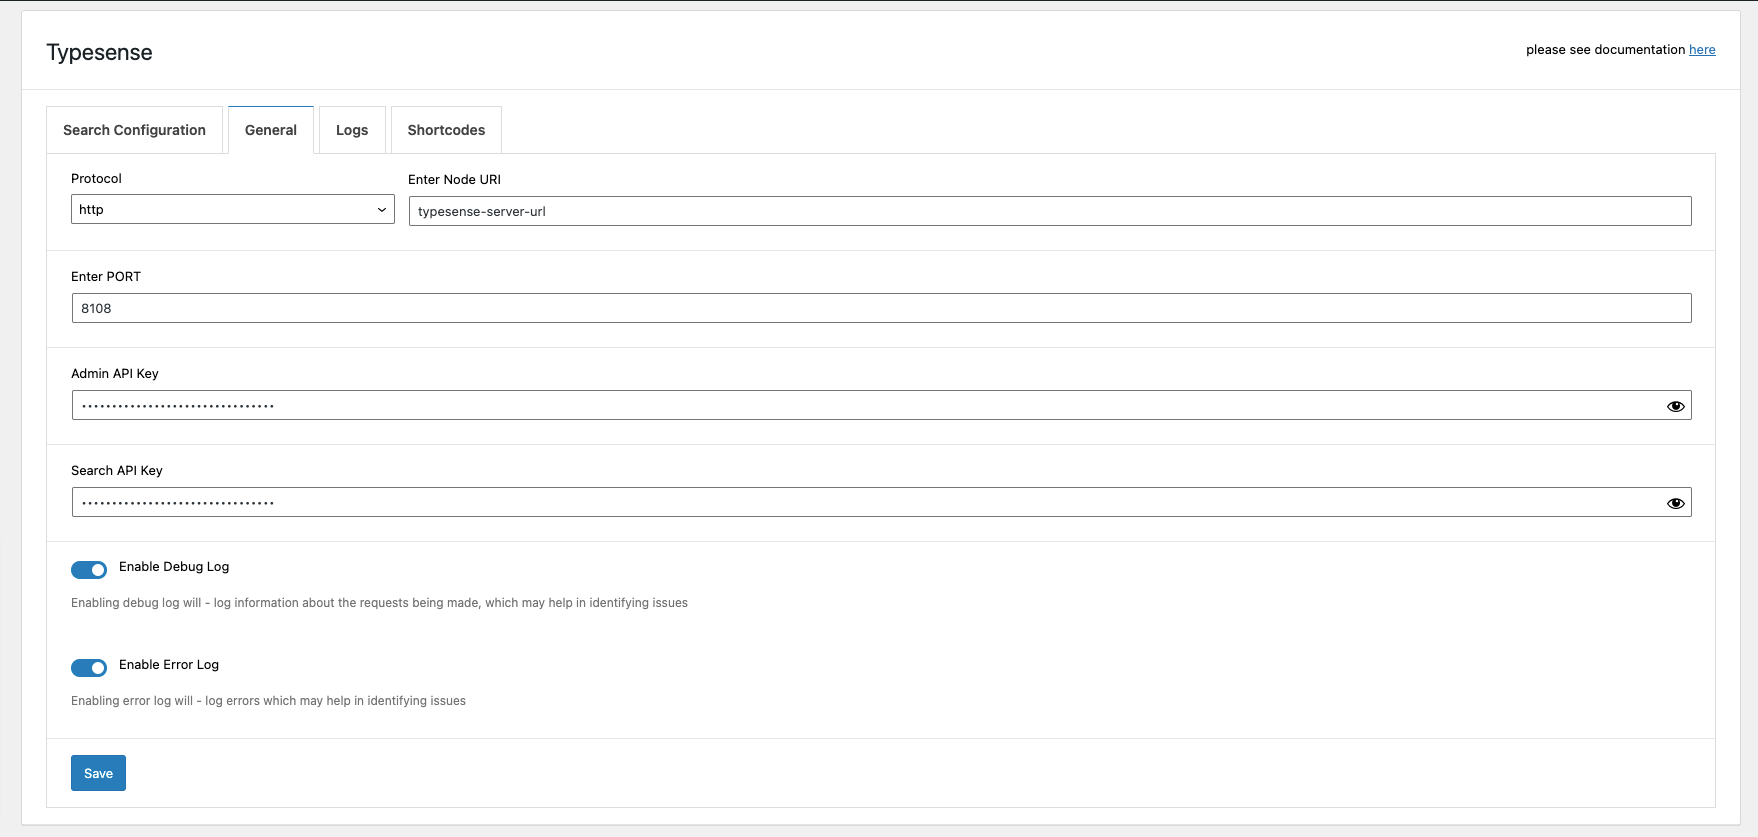
Your WordPress install will now be able to connect to your Typesense instance.
# Configuration
The next step is to enable and start indexing your posts/pages.
Go to WordPress Admin Area > Typesense > Search Configuration and from here you can:
- Enable Post Types
- Bulk Index
- Autocomplete Placeholder
- Autocomplete Input Delay
- Replace WordPress Search
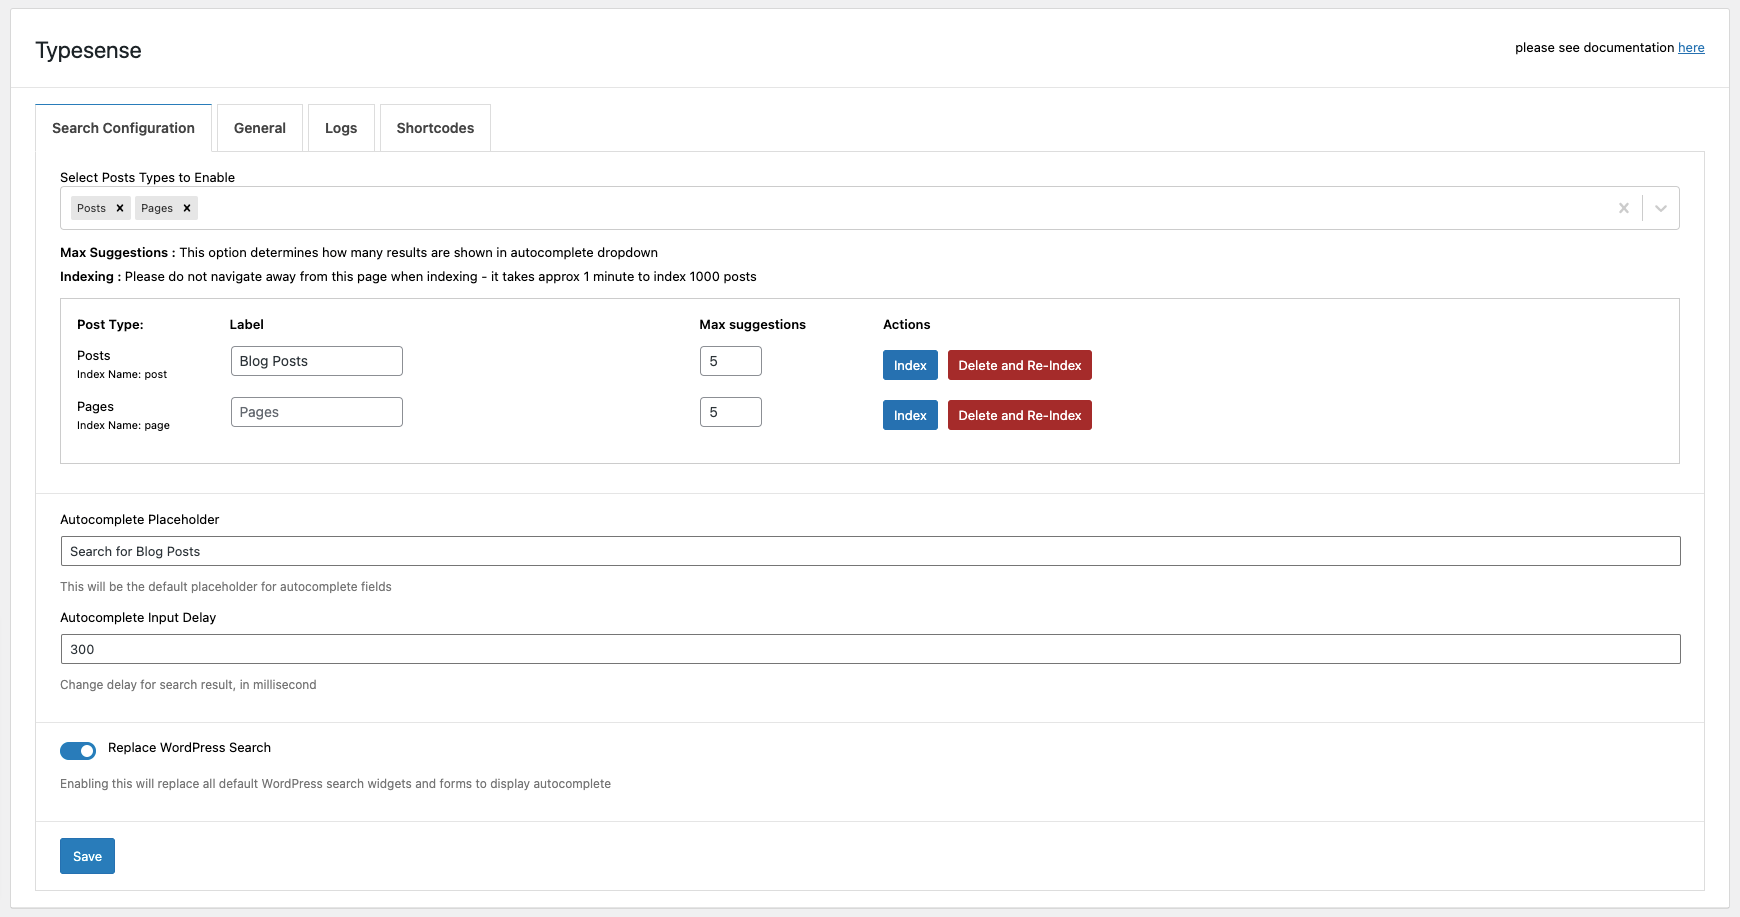
# Enable Post Types
This option allows you to select which post types to index. By default, the plugin allows you to index posts and pages. There are WordPress action hooks and filters that allow adding custom post types.
# Bulk Index
The bulk index option allows you to index all posts (post types) at once. You'll find options to
- Index
- Delete and Re-index (Only required if you have modified the schema (advanced usage).
# Replace WordPress Search
Enabling this option will replace all WordPress default search widgets and forms with an autocomplete search form, powered by Typesense.
You can see an example of this here (opens new window).
# Autocomplete Placeholder
This allows you to change the placeholder text for the autocomplete search (if replace WordPress search is enabled).
# Autocomplete Input Delay
Allows you to define delay time after input from user before retrieving results. Minimum delay time is 300 milliseconds.
And that's it - you are ready to go.
# Read More
There are many additional options to use the plugin with shortcodes and advanced customization options. Read more about them in the full documentation on https://codemanas.github.io/cm-typesense-docs/ (opens new window).
# SwiftSearch for Typesense - by Loopstates
SwiftSearch is an open-source, direct-to-node search plugin. It queries the Typesense cluster directly from the user's browser, bypassing the WordPress database and PHP execution layers to minimize server resource consumption.
- WordPress.org Plugin: SwiftSearch for Typesense (opens new window)
- GitHub Repository: Loopstates/swiftsearch-for-typesense (opens new window)
- Official Documentation: SwiftSearch Documentation (opens new window)
# Key Capabilities
- Direct-to-Node Queries: Sub-millisecond browser-to-node query architecture, bypassing WordPress database and PHP layers.
- Custom Post Type (CPT) Support: Native indexing for Posts, Pages, Products, and custom post types or taxonomies out of the box.
- Advanced Typesense Features: Native support for global Synonym Sets (v0.30+ API compatible).
- Visual Product Pinning (Merchandising): A dedicated admin dashboard to pin specific products or posts to the top of search results for designated search queries.
- Faceted Navigation & Metadata Mappings: A visual drag-and-drop builder to create multi-select filters using taxonomies and metadata (ACF, price, SKU).
- Local Search Analytics: Displays search trends and zero-result queries directly inside the WordPress dashboard without proxy middleware.
- WooCommerce Catalog Mode: Replaces default WooCommerce shop and category pages with instant search and sidebar filters.
- Page Builder Friendly: Integrates with Elementor, Divi, and Gutenberg blocks using shortcodes (
[swift_search]) or automatic search form replacement. - Developer Extensible: Includes custom JavaScript event listeners (e.g.
swift-search:hit-rendered) and WordPress PHP filters for query and document synchronization tuning. - Background Batch Syncing: Self-scheduling indexing engine processes catalogs in batches to prevent server script timeouts.
- GDPR & Privacy Ready: Bypasses third-party proxy middleware, ensuring direct connectivity and complete data ownership.
- Instant Autocomplete: Displays matching products, posts, and custom types the moment visitors start typing.
- Result Weighting & Tuning: Adjust search relevance and define custom ranking weights for titles, contents, and metadata fields.
- Automated Sync: Real-time document indexing and synchronization triggered automatically whenever content is saved, updated, or deleted.
- Global UI Customization: Visually toggle results layouts, thumbnails, prices, and excerpts directly from the admin panel.
- Translation & Multilingual Ready: Compatible with multi-language sites and translation plugins.
# Minimum Requirements
- PHP Version: 8.0.0 or higher
- WordPress Version: 6.0 or higher
# Installation
- Automatic: In your WordPress Admin panel, navigate to Plugins > Add New, search for
SwiftSearch for Typesense, install, and activate the plugin. - Manual: Download the plugin ZIP from the WordPress.org Plugin Directory (opens new window), upload it via Plugins > Add New > Upload Plugin, and activate it.
# Setup
Before configuring the plugin in WordPress, you need a running Typesense instance:
- Typesense Cloud: Set up a cluster on Typesense Cloud (opens new window). Once active, click Generate API Keys on your cluster dashboard to download your credentials text file.
- Self-Hosted: If you are running Typesense on your own server, generate your API keys following the instructions here: Generate API Keys.
From the downloaded credentials file or your self-hosted setup, locate the following details:
- Admin API Key (required for server-side indexing).
- Search Only API Key (required for client-side search queries).
- Nodes/Hostnames (along with port number and protocol).
# Configuration
Once you have your credentials, navigate to SwiftSearch in the WordPress admin menu. The setup wizard will guide you through the configuration:
- Connection Settings: Input your Typesense node host, port, protocol, and API keys. Ensure you input the Search Only API Key for public query requests to prevent exposing your Admin key to frontend clients.
- Content Settings: Select which Post Types to index (supports Pages, Posts, Products, and Custom Post Types/CPTs). Enable the global search override to replace standard search forms.
- Relevance: Define weights for your fields (e.g., matching titles higher than excerpts) and configure Synonym Sets (compatible with Typesense v0.30+ API).
- Search UI: Enable or disable facets for taxonomies and custom meta fields. Choose between the standard search override or replace the WooCommerce shop catalog.
- Styling: Customize colors and layout options to match your theme.
- Analytics: View search logs directly inside your admin panel, including search trends and zero-result queries.
- Pinning (Merchandising): Manually assign specific items to appear at the top of results for chosen keywords.
- Sync Management: Perform the initial index. Future updates, deletions, and new posts sync automatically in the background.
For advanced customization (such as PHP filter hooks or custom JS event listeners), refer to the SwiftSearch Documentation (opens new window).
This documentation site is open source. Found an issue? Edit this page (opens new window) and send us a Pull Request.
For AI Agents: View an easy-to-parse, token-efficient
Markdown version of this page. You can also replace
.html with .md in any docs URL. For paths ending in /, append
README.md to the path.